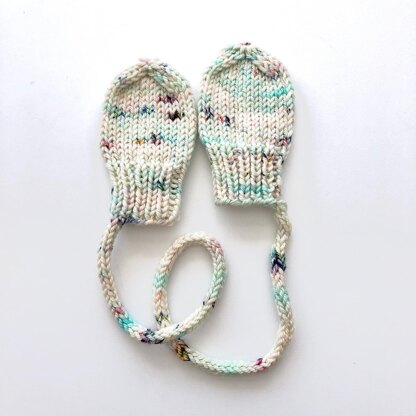
Knit by bit: mittens on a string
Published on December 14, 2015 By Angie 2 min read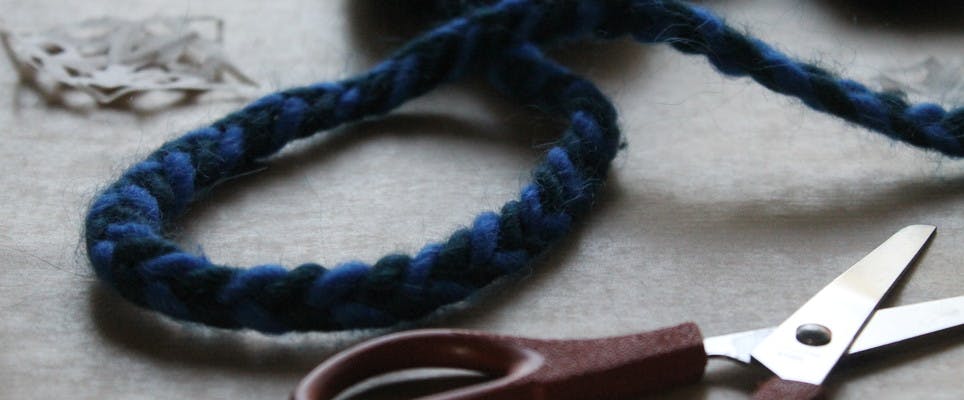
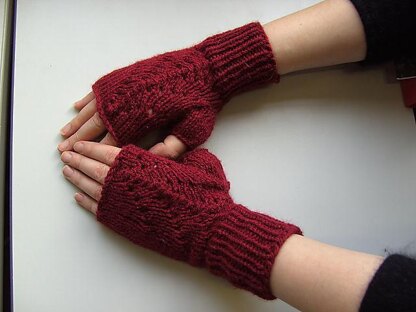
We’re talking about fall and winter fashions for kids this week, so Angie made some mittens on a string. These toasty handwarmers won’t end up in the lost and found bin!
When I was a kid, I was forever losing my winter accessories. Mittens, hats, scarves, you name it, I lost it. It’s a real wonder that my parents didn’t lose their minds and staple my mittens to my coat in a desperate attempt to keep from having to buy yet another set.
Though I don’t have kids, many of us at LoveCrafts do, and there’s no shortage of little ones in my family. I decided to save everyone’s sanity this winter and knit up some mittens on a string. An old concept, but an effective one – the string feeds through the arms of the coat, attaching one mitten to another. Genius.
Yarn
For these mittens, I used some of the Brown Sheep Lamb’s Pride Bulky yarn I only used small amounts of each shade, so you’d be perfectly fine buying one skein if you wanted to make the mittens in the same color. I used 2 different colors, because I can never limit myself to just one!
Needles
You’ll need 2 sets of needles for these, and they are knitted in the round. I used 5.5 mm and a 6 mm circular needles to knit with the magic loop method, but it’s perfectly fine to use DPNs.
Materials
- 1 x Brown Sheep Lamb's Pride Bulky in your choice of color
- Brown Sheep Lamb's Pride Bulky
- 5.5 mm circular needles
- Addi Lace Circular Needles 40cm
- 6 mm circular needles
- Addi Olivewood Circular Needles 80cm (32")
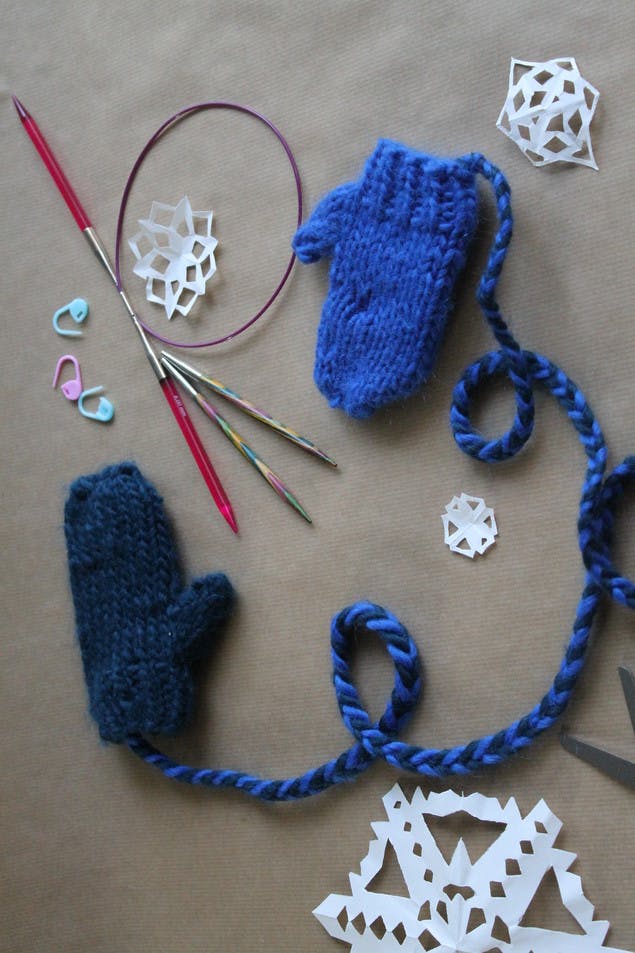
Mittens on a string step-by-step
1
To get started. Cast on 16 stitches using the smaller needles. K1 P1 across, and join to knit in the round, being careful to not twist the stitches, place marker to mark the beginning of the round. K1 P1 rib for 6 rows, and then change to larger needles.
2
With the larger needles. K6, place marker, K3, place marker, knit to end of row. K6, slip marker, (K1, make one) x 2, K1, slip marker, knit to the end of row (5 stitches between markers).
3
Next. K6, slip marker, K1, make one, K3, make one, K1, slip marker, knit to the end of the row (7 stitches between markers). K6, slip marker, K1, make one, K5, make one, K1, slip marker, knit to the end of the row (9 stitches between markers).
4
Keep going. K6, remove marker, K1, place 7 stitches on a stitch holder, K1, remove marker, knit to the end of the row. Continue knitting all rows until the mitten measures 4.5 inches from the base.
5
Begin decreases. *SSK, Knit to the last 2 stitches, K2tog.* Repeat * to * until you have 10 stitches left. Using a yarn needle, draw the yarn through all of the stitches and pull tight. Sew in the ends.
6
For the thumb. Pick up the 7 stitch holder stitches and knit a row, purl a row. K3, K2tog, K2. Purl a row. K2tog x 2, K1. Purl a row.
7
Sew it up. Using a yarn needle, draw the yarn through the 3 remaining stitches, and seam up the thumb, making sure to seam the hole where it meets the main body of the mitten closed.
8
Making the string. You can choose to do this a number of ways, but I chose to use 2 pieces of each color about 2 yards long, and fishtail braid them for strength. This also creates a fun chevron design in the string which I love! After tying off the ends, I sewed them into the inside cuff of the mitten. Voila! One pair of mittens on a string!